View Basics
在iOS中,每一个应用都有一个UIWindow的对象,他是应用中所有view的容器(container),其实UIWindow自己也只是一个view,只不过他的职责不是显示view,而是作为容器存放view。当应用启动的时候,这个对象就被创建,我们可以往这个容器里面添加其他的view。那么什么是view呢?他是在屏幕上被显示的元素,例如button。每一个view都是UIView或UIView的子类的一个实例,每一个view都有一个对应的layer,view在其对应的那样儿上显示自己,我们可以想象成每个view都自带了一块画板,在画板上作画然后贴到最大的canvas(UIWindow)上去。view还能handle屏幕上的一些事件,例如button能handle touch事件。view之间存在层级关系(hierarchy),一个view可以包含另一个view,我们可以把其中的关系想象成一棵树,根结点就是UIWindow。
Frames & View Hierarchy
我们通过一个小例子来阐述view的frame。首先新建一个empty application,然后创建一个类,继承自UIView:
1
2
@interface BNRHypnosisterView : UIView
@end
当一个类继承自UIView时,会继承两个方法,initWithFrame:和drawRect,前者是UIView的默认init方法,后者默认情况下是被注释,因为只有在custome的时候才需要他。initWithFrame接受一个CGRect参数,他是定义在父类(UIView)中的一个property:
1
@property ( nonatomic ) CGRect frame ;
一个UIView的frame定义了这个view相对于其superview的位置和大小,CRRect中包含了两个关键信息(origin和size),一是frame左上角初始点的坐标(origin.x, origin.y),其次定义了这个frame的大小(size.width, size.height)。值得注意的是,这里的origin和size都不是objective-c中的对象,他们均是C语言中的结构体,所以在定义CGRect的时候不能写成:
而应该这样定义:
1
CGRect frame = CGRectMake ( origin . x , origin . y , size . width , size . height );
现在我们来到应用的appDelegate类,找到application:didFinishLaunchingWithOptions:方法,在里面定义一个view(firstView),同时定义一个frame(fristFrame),然后再把这个frame加到view里去,最后需要做的就是把包含有一个frame的这个view加入到application的root view里面去,这样就能被显示了:
1
2
3
4
5
6
7
8
9
10
11
12
13
14
15
- ( BOOL ) application: ( UIApplication * ) application didFinishLaunchingWithOptions: ( NSDictionary * ) launchOptions
{
self . window = [[ UIWindow alloc ] initWithFrame :[[ UIScreen mainScreen ] bounds ]];
// Override point for customization after application launch.
CGRect firstFrame = CGRectMake ( 100 , 200 , 100 , 140 );
BNRHypnosisterView * firstView = [[ BNRHypnosisterView alloc ] initWithFrame : firstFrame ];
[ self . window addSubview : firstView ];
firstView . backgroundColor = [ UIColor redColor ];
self . window . backgroundColor = [ UIColor whiteColor ];
[ self . window makeKeyAndVisible ];
return YES ;
}
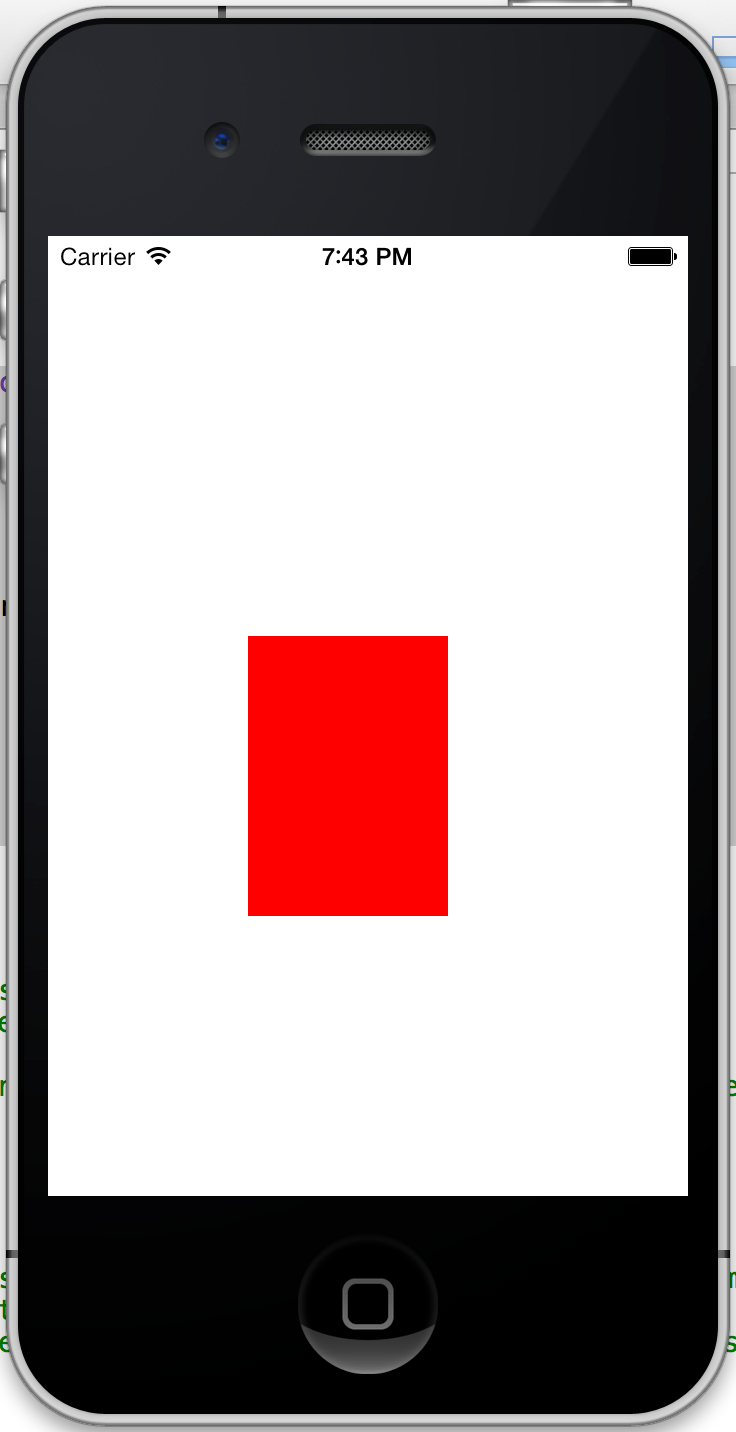
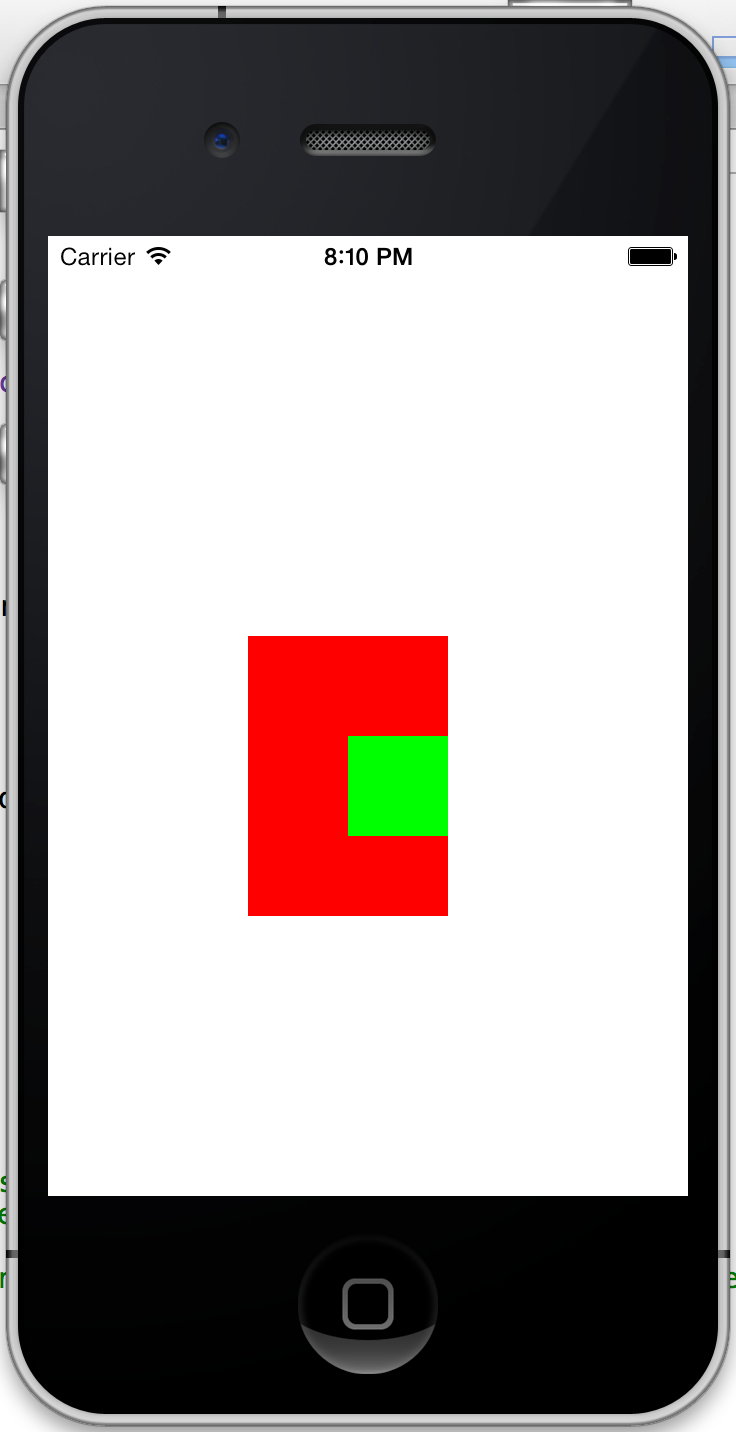
运行后,出来的效果会是这样的:
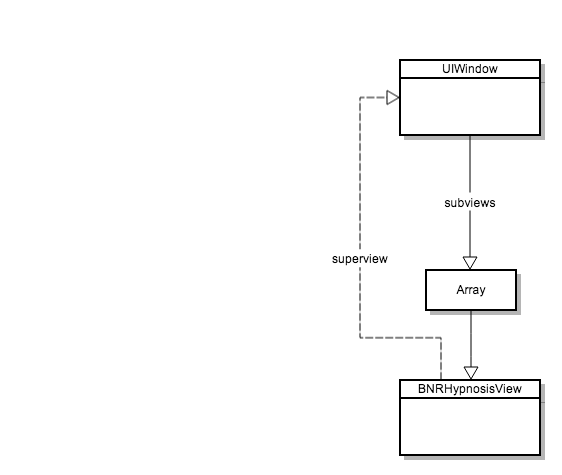
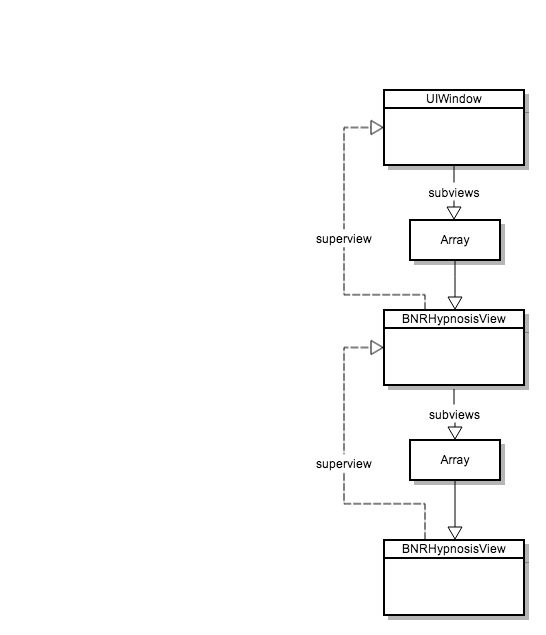
当我们把一个新的view加入到UIWindow之后,他们之间的关系就如下面这样:
此外,当加入一个subview的时候,subview指向superview的关系自动被创建,不过为了避免强引用环(strong reference cycle),subview指向superview的引用被设为weak(图中虚线部分)。
这时,我们尝试再往UIWindow里面加上一个view:
1
2
3
4
5
6
7
8
9
10
11
12
13
14
15
16
17
18
19
20
21
22
- ( BOOL ) application: ( UIApplication * ) application didFinishLaunchingWithOptions: ( NSDictionary * ) launchOptions
{
self . window = [[ UIWindow alloc ] initWithFrame :[[ UIScreen mainScreen ] bounds ]];
// Override point for customization after application launch.
// CGRect firstFrame = self.window.bounds;
CGRect firstFrame = CGRectMake ( 100 , 200 , 100 , 140 );
BNRHypnosisterView * firstView = [[ BNRHypnosisterView alloc ] initWithFrame : firstFrame ];
[ self . window addSubview : firstView ];
firstView . backgroundColor = [ UIColor redColor ];
CGRect secondFrame = CGRectMake ( 50 , 50 , 50 , 50 );
BNRHypnosisterView * secondView = [[ BNRHypnosisterView alloc ] initWithFrame : secondFrame ];
[ self . window addSubview : secondView ];
secondView . backgroundColor = [ UIColor greenColor ];
self . window . backgroundColor = [ UIColor whiteColor ];
[ self . window makeKeyAndVisible ];
return YES ;
}
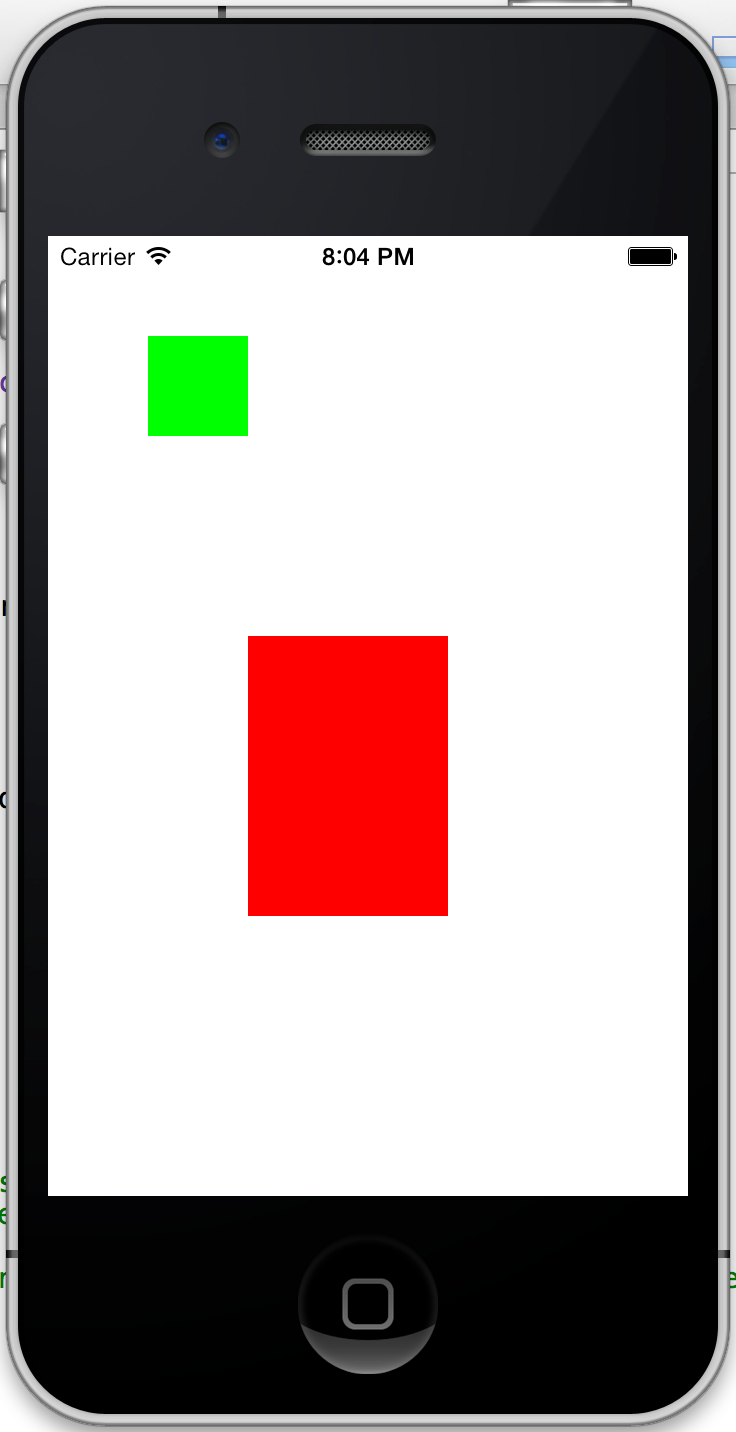
这时出来的效果应该是这样的:
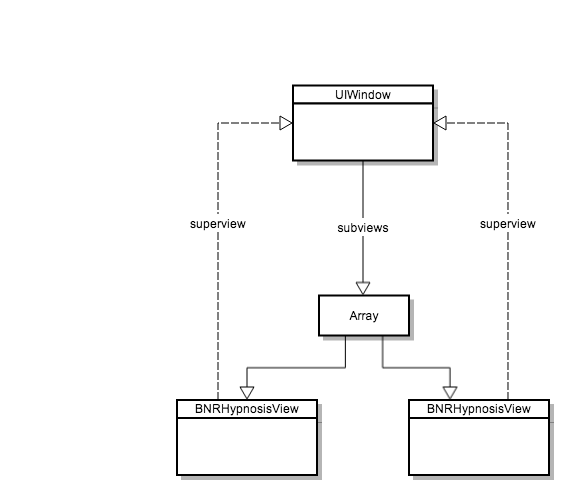
对应的层次关系应该是这样的:
我们甚至可以把secondView作为firstView的subView,只需要改一行代码就行:
1
2
// [self.window addSubview:secondView];
[ fistView addSubview : secondView ];
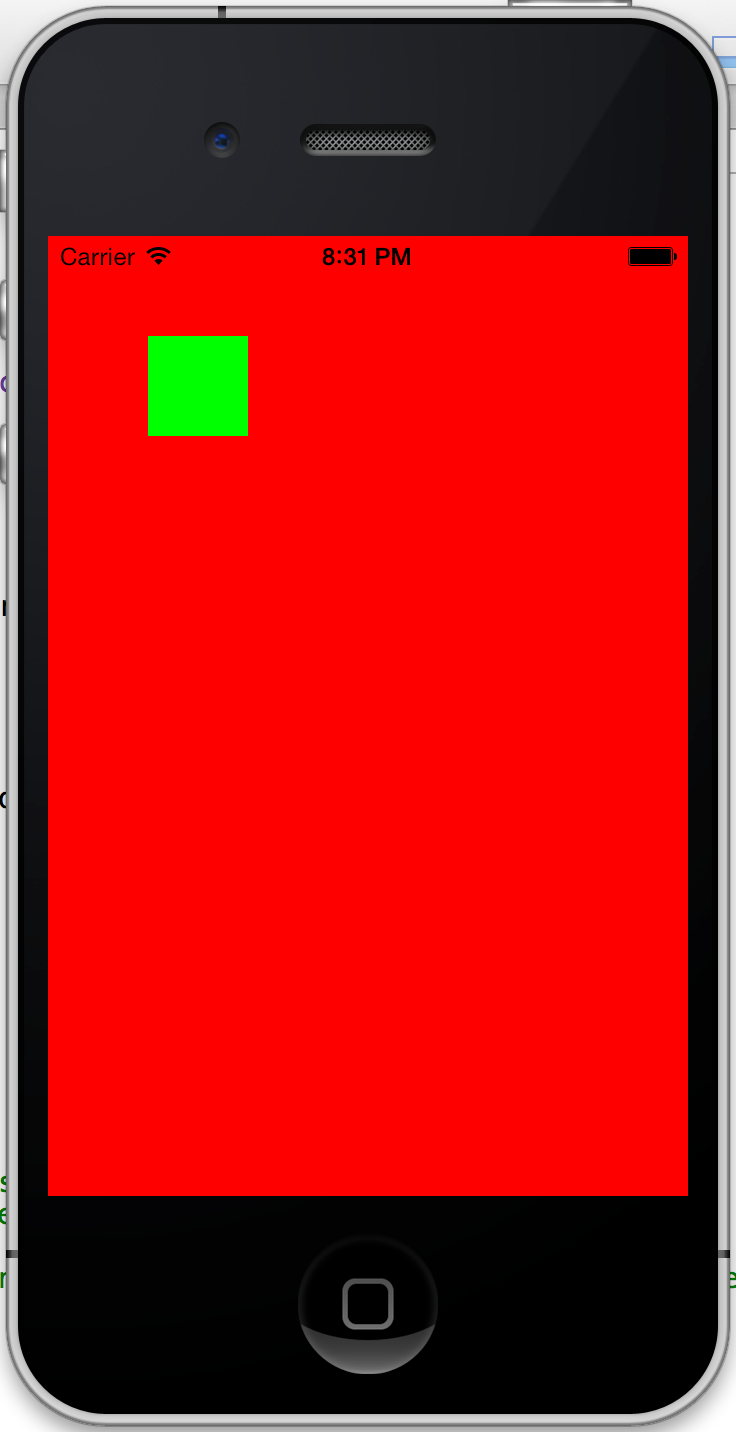
这时出来的效果应该是这样的:
对应的层次关系如下:
Customer Drawing in drawRect
每一个view都有一个bounds,他指的是这个view的范围,他与frame的区别在于:bounds是相对于自身来说的范围,而frame是相对于superview的范围(之前在定义frame的时候包含的参数包括起始点和长宽,这个起始点就是相对于superview的距离)。
现在我们回到AppDelegate,把原来声明frame的语句改成下面这样:
1
2
// CGRect frame = CGRectMake(100, 200, 100, 140);
CGRect frame = self . window . bounds ;
他的意思是把root window的bounds作为subview的frame,换句话说就是实现subview全屏.所以现在的运行效果应该是这样的:
draw concentric circle
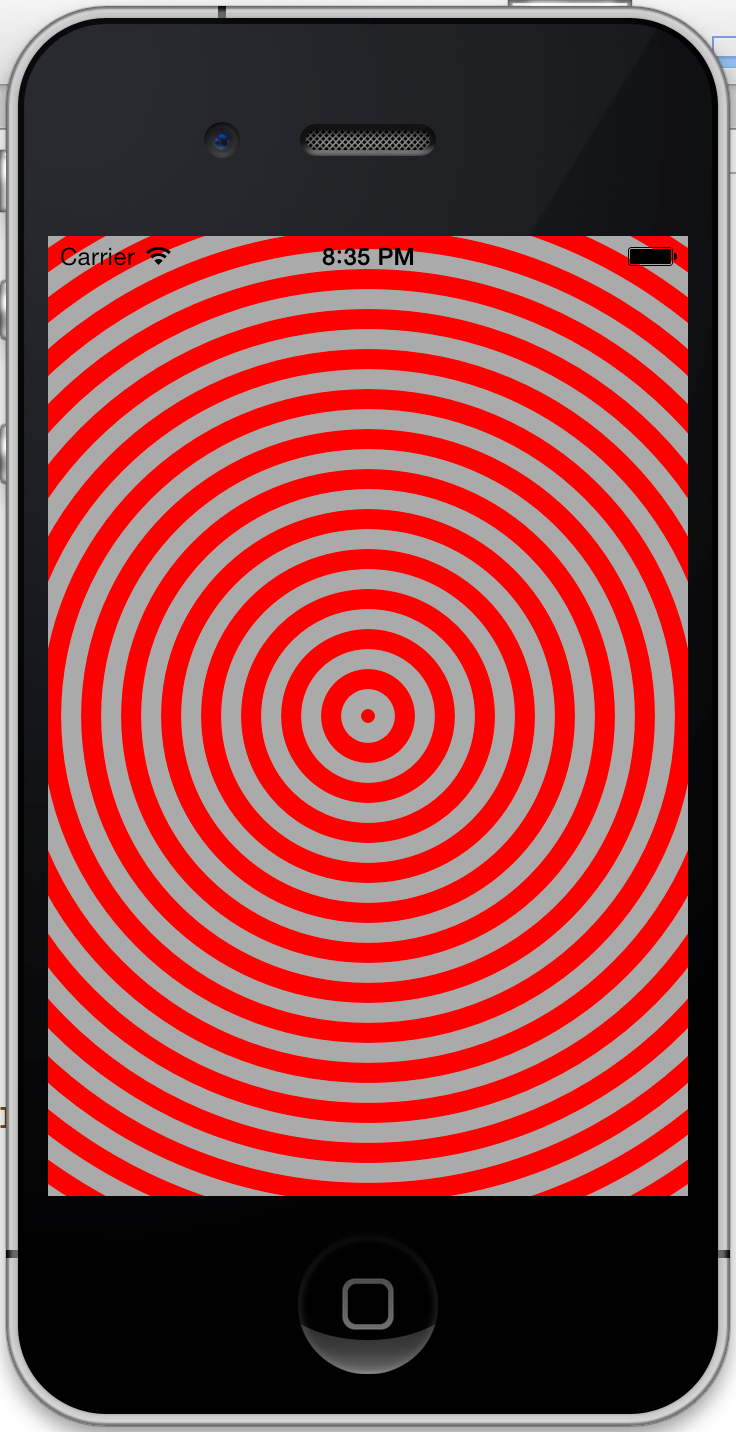
现在我们来做一点有意思的事情:画同心圆. 我们之前说过,如果需要自定义一些drawing,需要在drawRect方法中进行,当xCode发现drawRect方法不是被注释的情况下,会对UIWindow中的每一个view应用drawRect方法中定义的drawing.所以现在我们来到drawRect方法中做一些改变,最后达到的效果就如下图所示:
首先我们从最外层圆入手,定义圆心和半径:
1
2
3
4
5
6
7
CGRect bounds = self . bounds ;
CGPoint center ;
center . x = bounds . origin . x + bounds . size . width / 2 ;
center . y = bounds . origin . y + bounds . size . height / 2 ;
float maxRadius = hypot ( bounds . size . width , bounds . size . height ) / 2 ;
定义好了圆心和半径,就可以开始画圆了.在objective-c中有一个很常用的画图类,叫做UIBezierPath,这个类里面定义了很多方法可以用来作图,当然画圆也不在话下.通过查看这个类的API,我们发现有一个叫做addArcWithCenter:c radius:r startAngle:s endAngle:e clockwise:的方法可以用来画圆,参数分别的含义是圆心,半径,起始角度(0),终止角度(360)和顺时针/逆时针(这里无所谓).最后定义好一切之后就需要作图了,调用UIBezierPath类的stroke方法即可:
1
2
3
4
5
6
7
8
9
10
11
12
13
14
15
16
17
18
19
20
21
- ( void ) drawRect: ( CGRect ) rect
{
// Drawing code
CGRect bounds = self . bounds ;
CGPoint center ;
center . x = bounds . origin . x + bounds . size . width / 2 ;
center . y = bounds . origin . y + bounds . size . height / 2 ;
float maxRadius = MIN ( bounds . size . width , bounds . size . height ) / 2 ;
UIBezierPath * path = [[ UIBezierPath alloc ] init ];
[ path addArcWithCenter : center radius : maxRadius startAngle : 0 endAngle : M_PI * 2 clockwise : YES ];
path . lineWidth = 10 ;
[[ UIColor lightGrayColor ] setStroke ];
[ path stroke ];
}
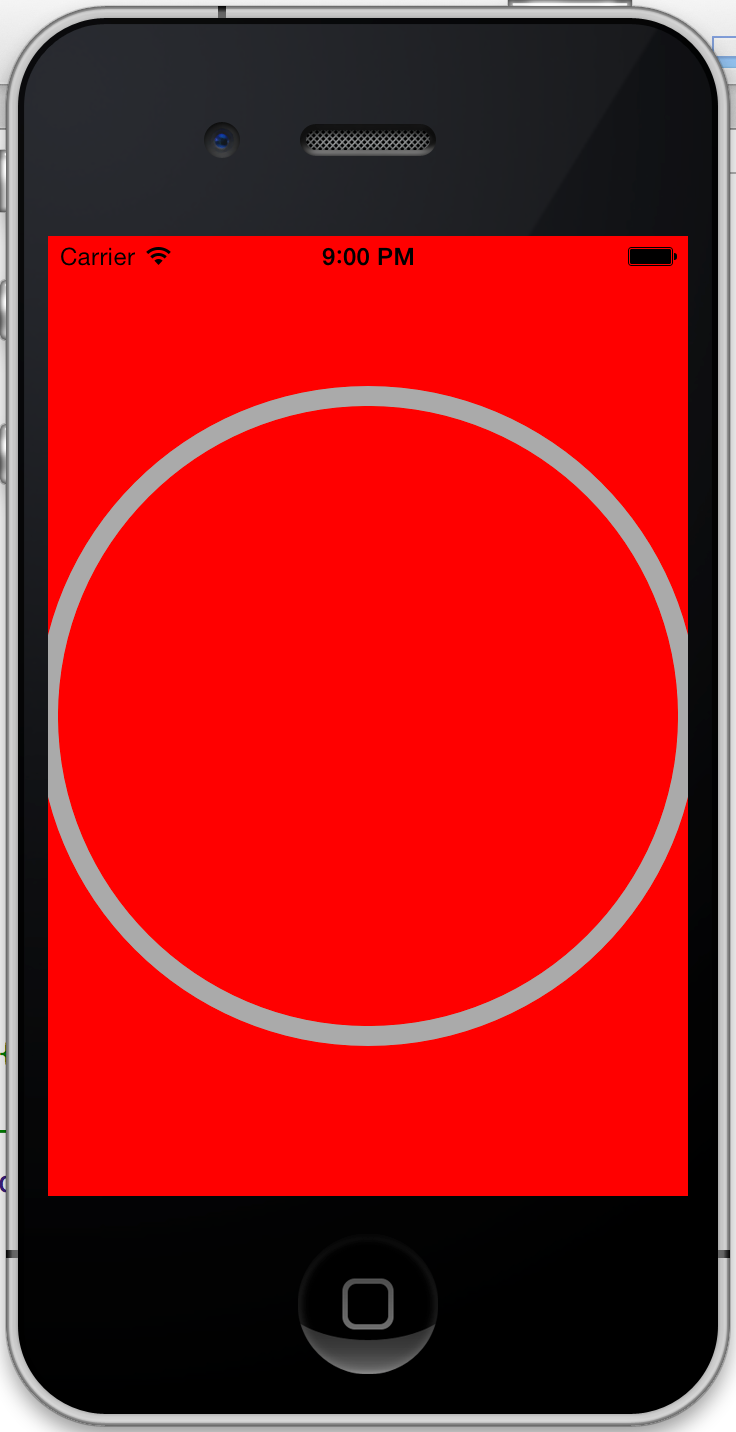
上面的代码中path.lineWidth设置线的宽度,[[UIColor lightGrayColor] setStroke]用来设置线的颜色,最后出来的效果应该如下:
既然画好了一个圆,那么可以开始画其他的了.我们可以定义一个for循环,每次循环减少一定的半径,圆心不变.只需要修改一行代码:
1
2
3
4
5
6
// [path addArcWithCenter:center radius:maxRadius startAngle:0 endAngle:M_PI * 2 clockwise:YES];
for ( float currentRadius = maxRadius ; currentRadius > 0 ; currentRadius -= 20 ) {
// [path moveToPoint:CGPointMake(center.x + currentRadius, center.y)];
[ path addArcWithCenter : center radius : currentRadius startAngle : 0 endAngle : M_PI * 2 clockwise : YES ];
}
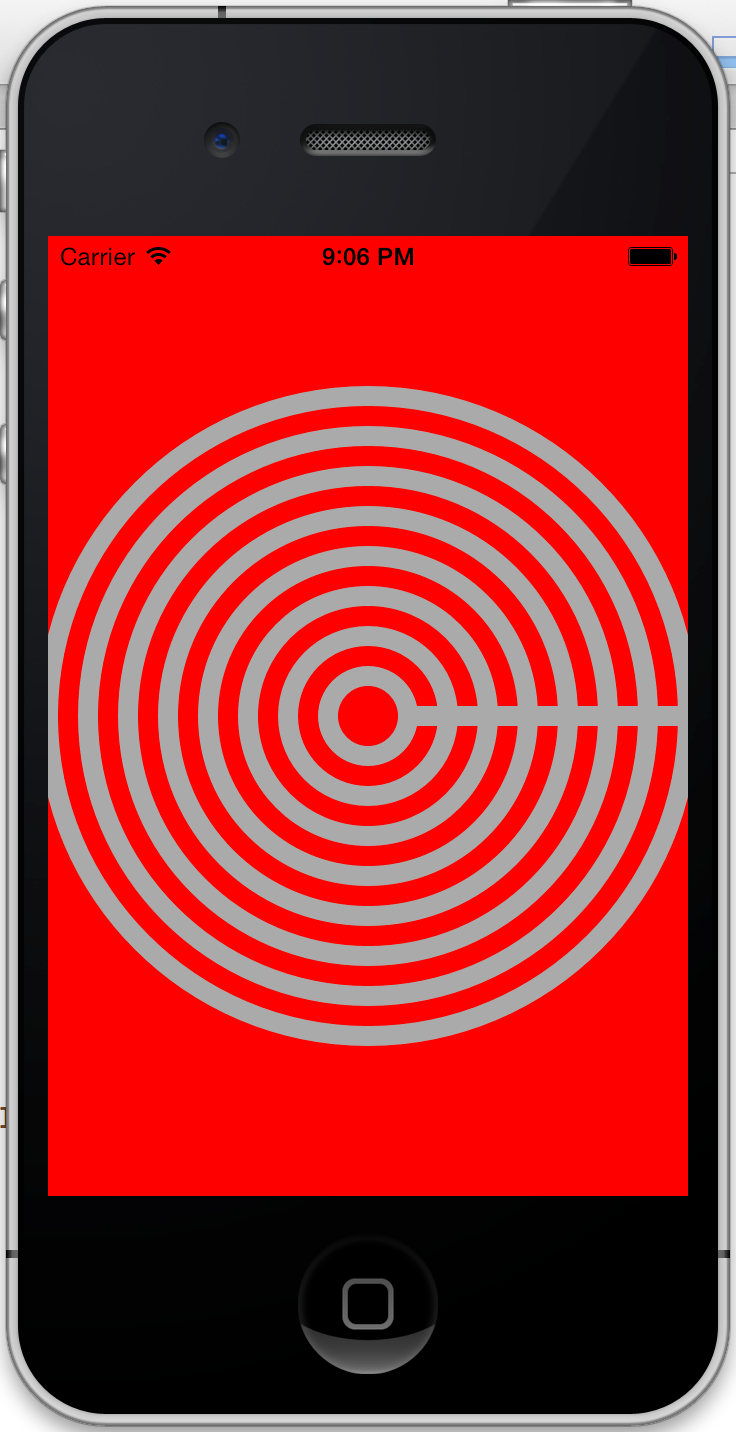
运行的效果:
这时还有两个问题:1.为什么有一条直线 2.应该是满屏的圆.首先我们来解决第一个问题.画过画的同学都知道,当在画同心圆的时候,从一个圆跳到下一个圆上去应该从纸上拿起铅笔然后开始画下一个圆,如果不拿起来的话就成了一笔画,所以两个圆之间会有一条连线,问题就出在这里.为了让电脑"提起笔",我们应该在每次画完一个圆之后调用一个相应的方法告诉他,所以for循环应该改成下面这样:
1
2
3
4
for ( float currentRadius = maxRadius ; currentRadius > 0 ; currentRadius -= 20 ) {
[ path moveToPoint : CGPointMake ( center . x + currentRadius , center . y )];
[ path addArcWithCenter : center radius : currentRadius startAngle : 0 endAngle : M_PI * 2 clockwise : YES ];
}
修改完成后运行:
最后修改满屏的问题,想一想就知道,肯定与圆的半径有关,半径大一些的话,屏幕上就都是圆了,那么究竟要多大呢?只需要一个圆能包含屏幕的四个角就行了(circumcircle),而这也只需要修改一行代码:
1
2
// float maxRadius = MIN(bounds.size.width, bounds.size.height) / 2;
float maxRadius = hypot ( bounds . size . width , bounds . size . height ) / 2 ;
再次运行,就达到了最终的效果:
